 English


Your cart
There are no more items in your cart


.jpg)


- toc Furniture
- remove_red_eye 15843 views
A well adjusted binding allows you to anticipate the release of the bindings in case of a fall, and therefore reduce the risk of injury. But a good setting of the ski bindings also allows a better transmission of power between the skier and his equipment and thus maximizes the pleasure of skiing and performance. If not properly adjusted, the bindings could come off at the first turn and send you tumbling down the slope! Or, conversely, never take off your boots and injure yourself in a fall.
Two steps are essential for the correct adjustment of the bindings: the adjustment position and the adjustment of the bindings according to the skier's profile. It is therefore imperative to gather several pieces of information about the skier before starting to adjust the bindings:
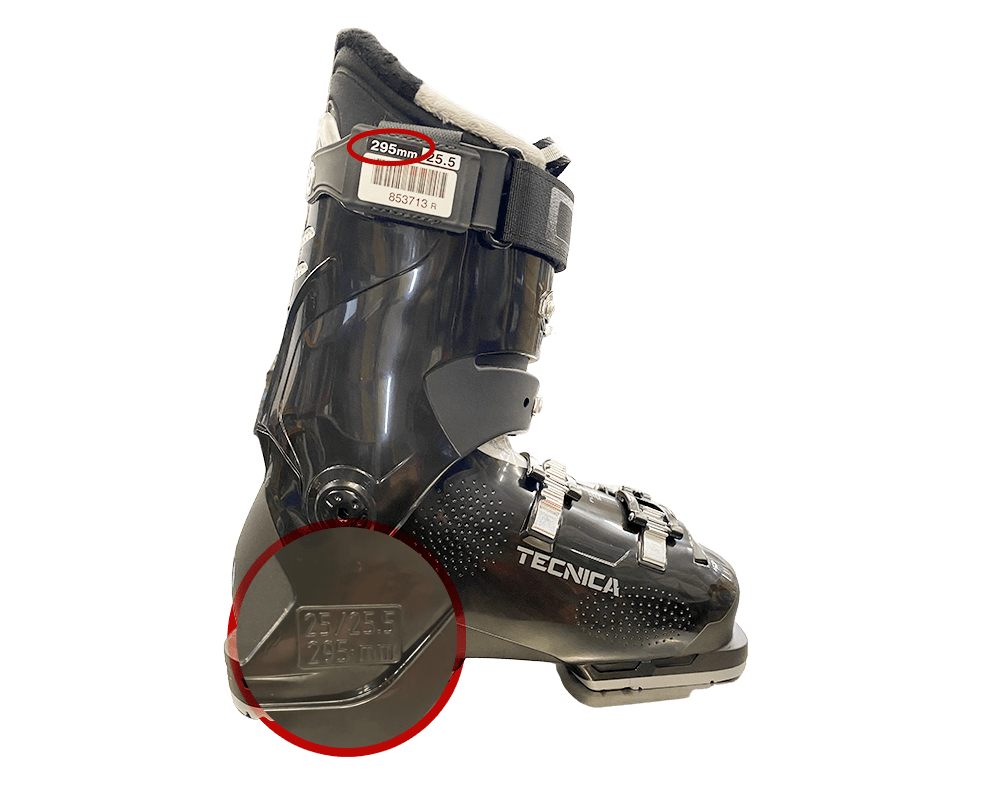
- The length of the sole of the ski boots (usually engraved on the heel and in mm, and not to be confused with the size indicated in 24 - 24.5...28.5 - 29...)
- The weight and height of the skier which determines the DIN setting (binding release power)
- The level of the skier (beginner, intermediate, advanced ...) which allows to refine the DIN setting, as well as the age of the skier
- The practice, which determines the position of the binding on the ski. A classic position for a versatile ski or a rear position for freeride...
BINDING ADJUSTMENT POSITION ACCORDING TO YOUR SKI BOOTS
First step, adjusting the length and thrust.
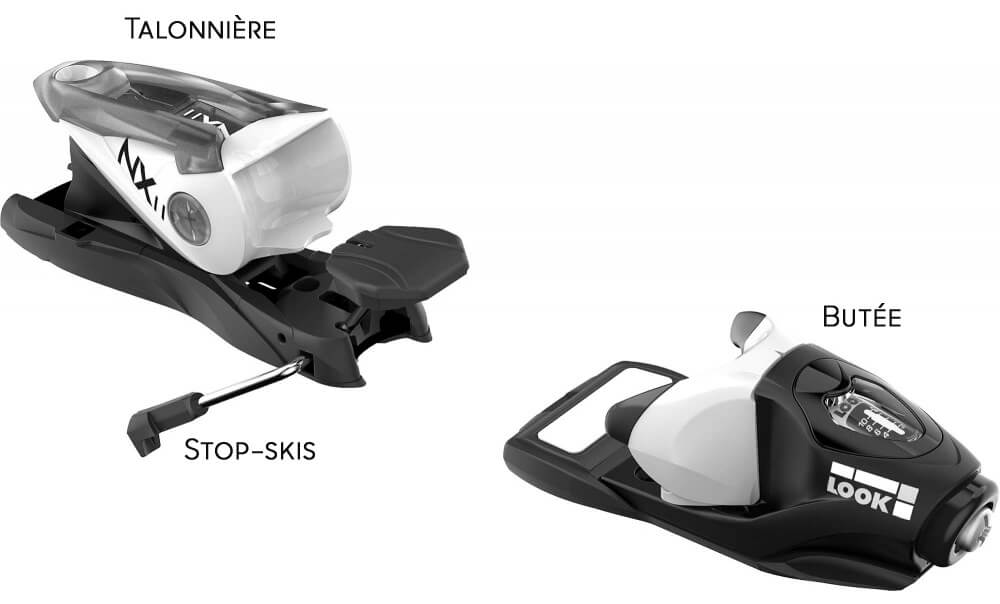
Two distinct parts make up a ski binding, and on each of them you can find adjustment indicators:
- the toe-piece (la butée), the part at the front, which determines the length of the sole as well as the release force
- the heel piece (la talonnière), which is at the back, determines the compression
First, you only need to adjust (using the tabs / languettes de réglage) the stop and the heel piece. Slide the stop until you reach the number range (intervalle des tailles) in which your shoe size falls, then do the same for the heel pad.
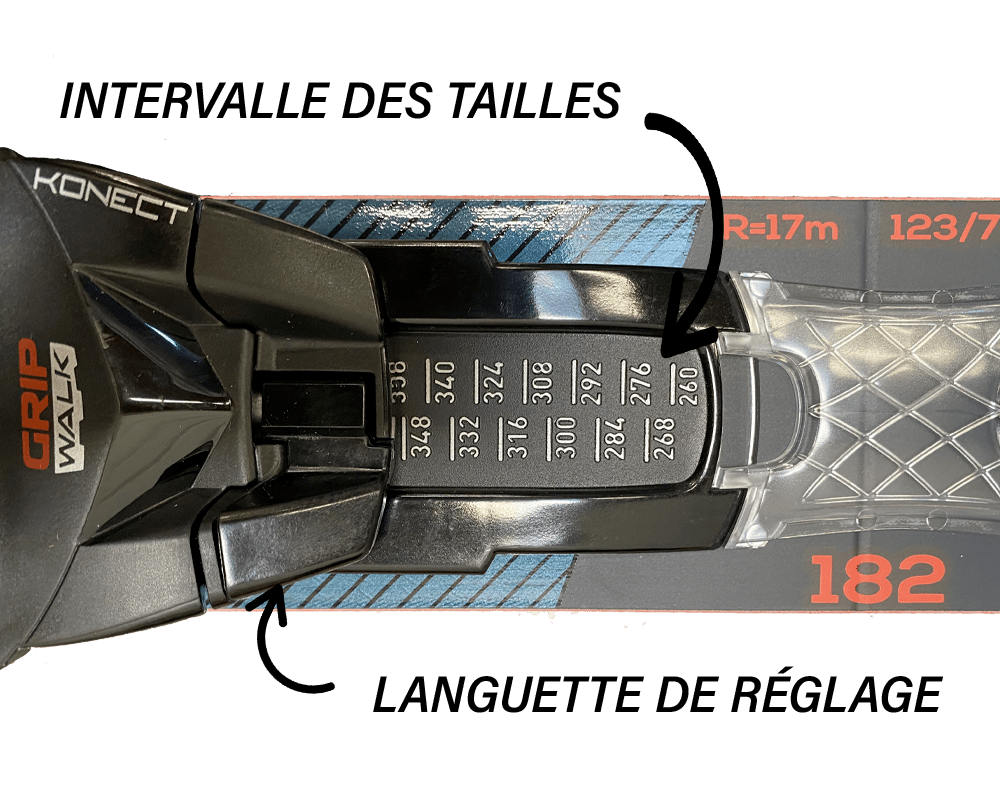
Check your adjustment! Your ski boot must fit perfectly in the ski binding! Push in the front of the boot and then the back, with a little pressure the boot should snap in easily and both ends should be locked into the binding!
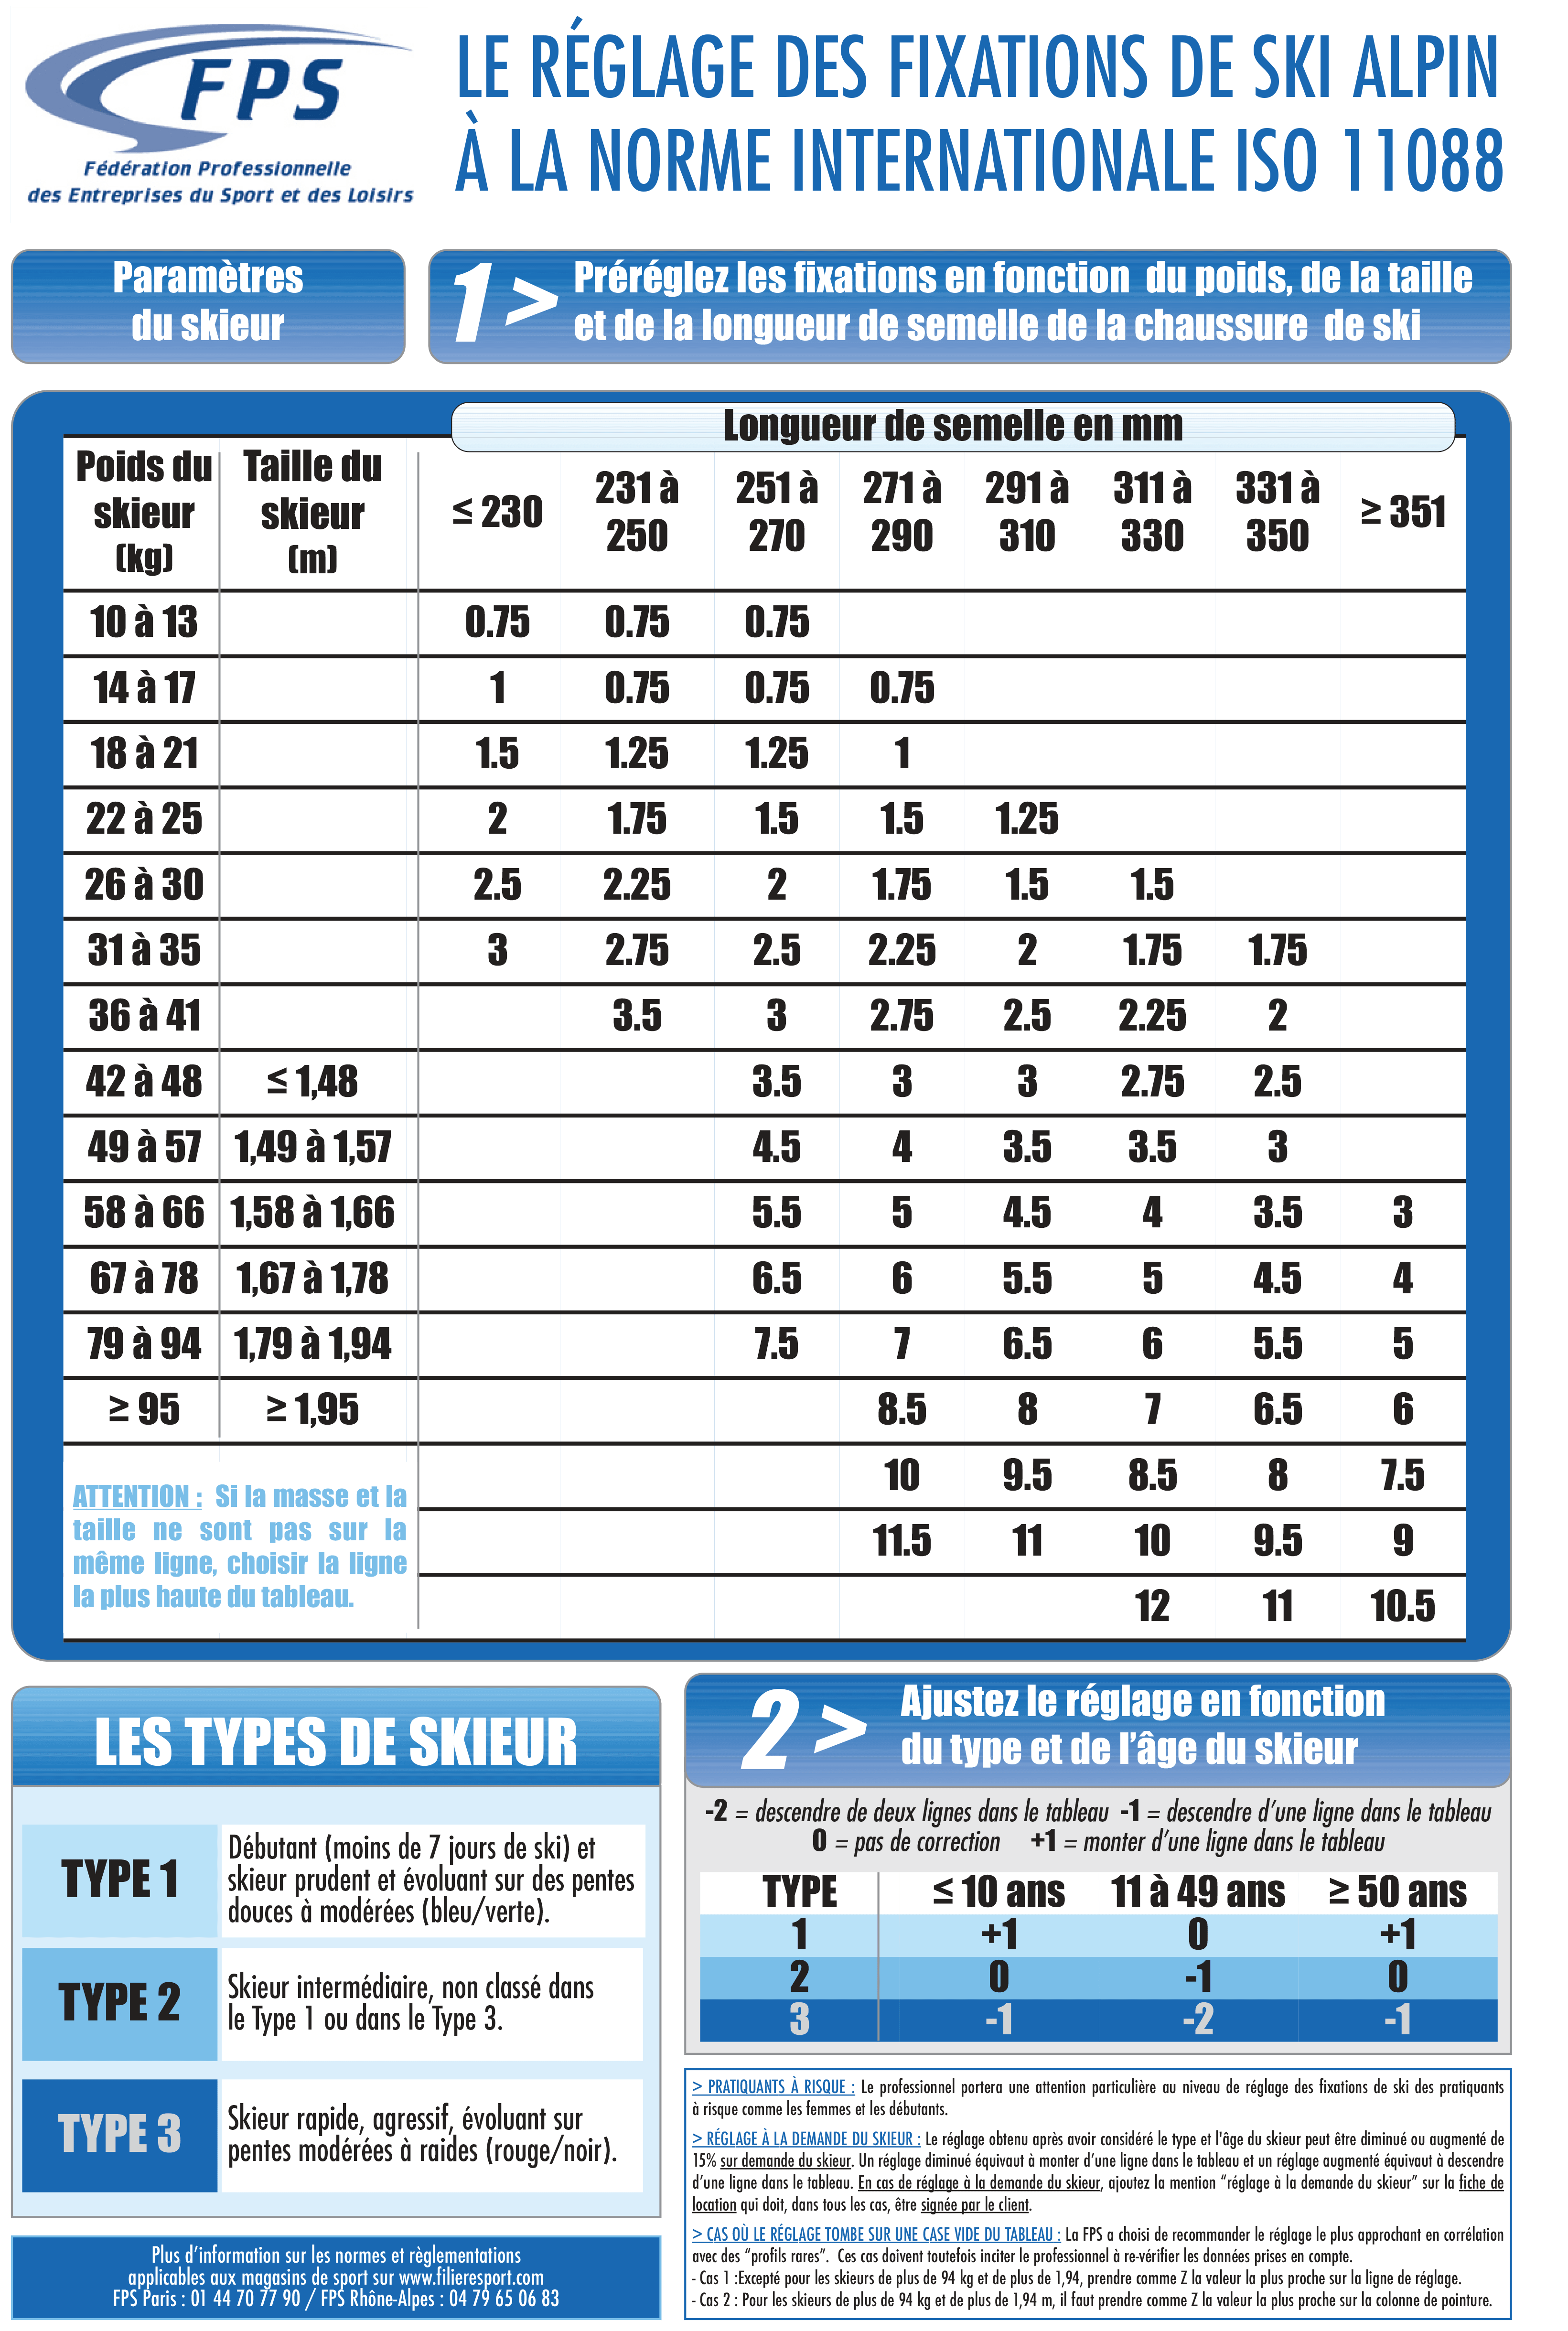
ADJUSTING THE BINDING TO THE SKIER'S PROFILE (DIN)
This is an important step as it determines the release point of the binding. Once again, your safety is paramount and a binding set too low will release too often, just as a binding set too high will prevent release and therefore increase the risk of injury! For an optimal adjustment, let's take a look at the criteria necessary for the adjustment of your bindings: the weight of the skier, the height, the age, his level of skiing and his practice.
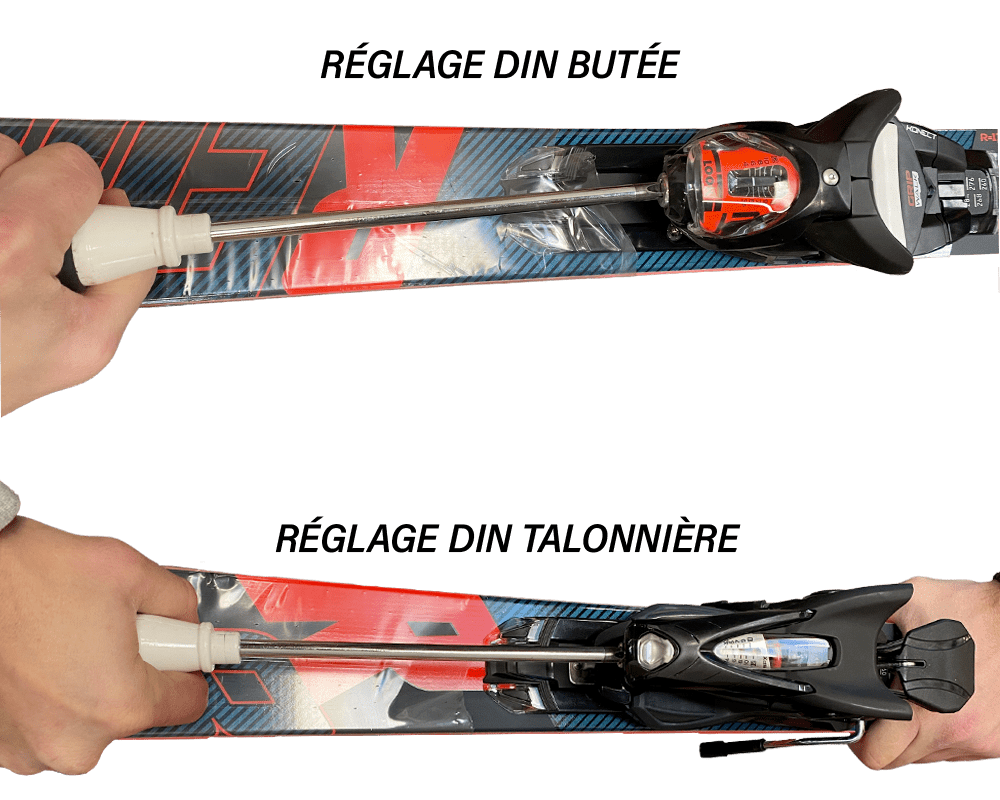
In order to adjust your bindings, look for the graduations on the end of your binding. The values correspond to the release value (the higher the number, the less easy it is to release). Below you will find a table summarising the settings according to weight, size and ski level!
Use a screwdriver to lower or raise the scale according to the values in the table above. Perform this operation on the stop but also on the heel of your binding!
SUMMARY TABLE OF ADJUSTMENTS
For any purchase of a pair of skis on Ski Occas, we offer you the assembly of the ski bindings for free! All you have to do is send us the necessary data for the adjustment and you will receive your skis adjusted and ready to hit the slopes.
If you have any doubts, or if you are not able to adjust your skis at home, don't hesitate to ask us for advice in one of our Precision Ski, Ski Républic or Freeride shops