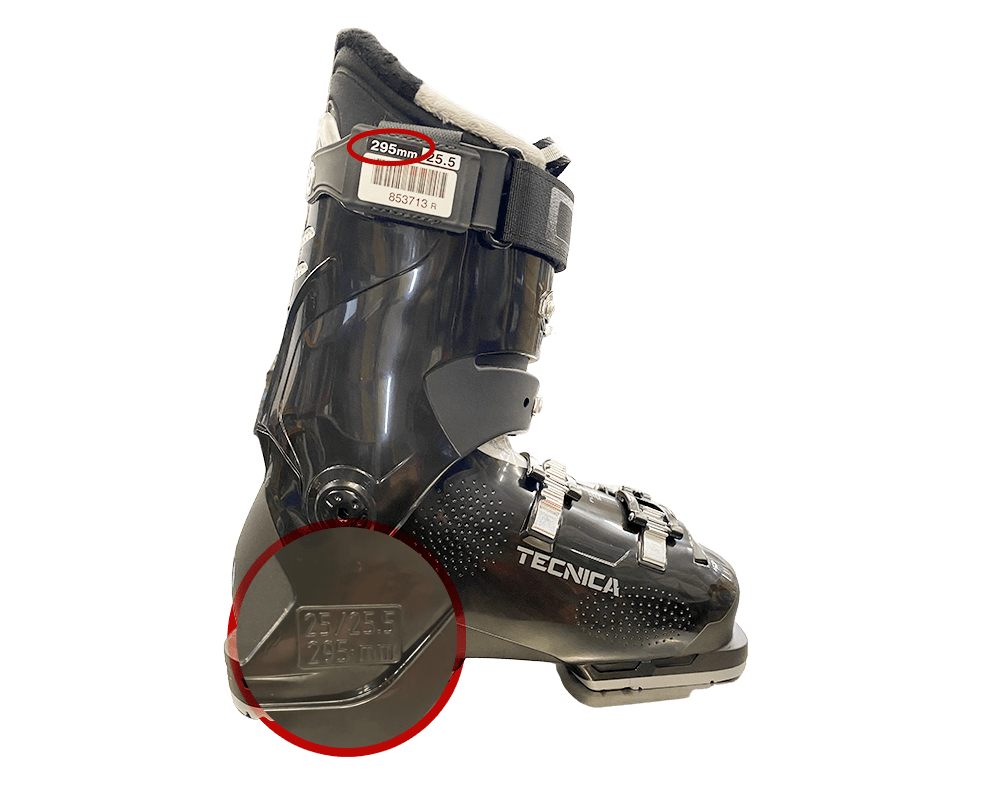
Vérifiez votre réglage ! Votre chaussure de ski doit s’enclencher parfaitement dans la fixation de ski ! Entrez l’avant de la chaussure puis l’arrière, avec un peu de pression la chaussure doit s’enclencher facilement, et les deux extrémités doivent être bloquées dans la fixation !
Ajuster le réglage en fonction du profil du skieur (DIN)
Etape importante puisqu’elle determine le seuil de déclenchement de la fixation. Encore une fois votre sécurité est primordiale et un fixation réglée trop faiblement provoque des déclenchements trop fréquents, tout comme un réglage trop fort de la fixation empêche le déchaussement et donc augmente les risque de blessures ! Pour un réglage optimal, reprenons les critères nécessaires à l’ajustement de vos fixations: le poids du skieur, la taille, l'âge, son niveau de ski et sa pratique.
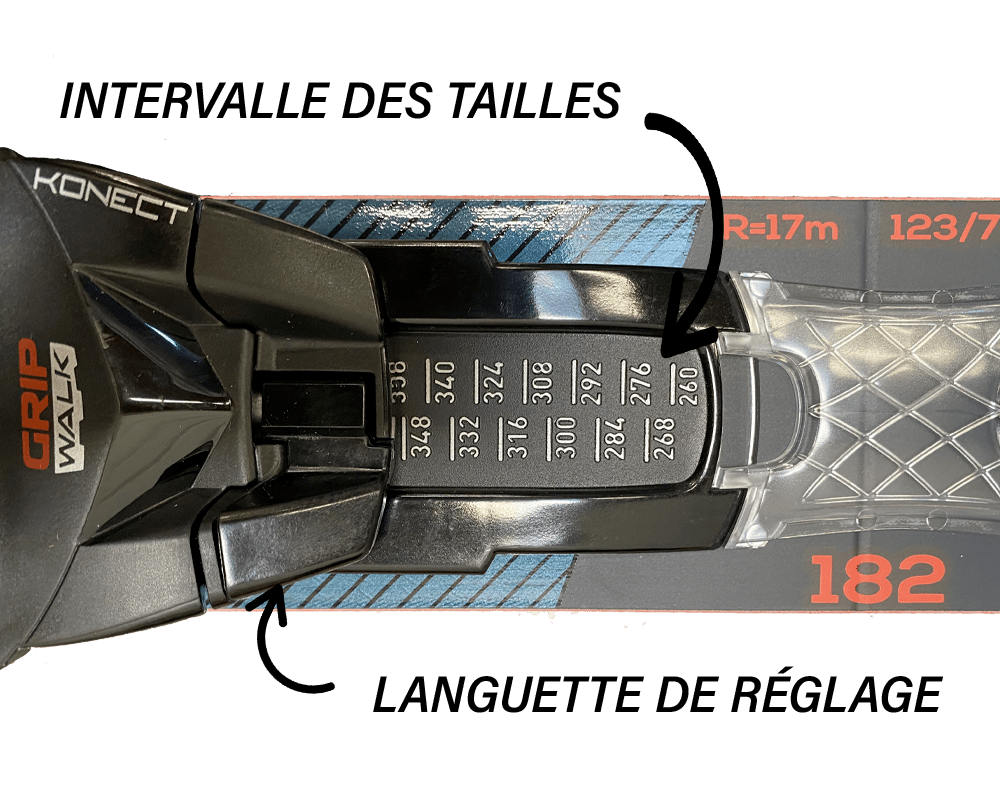
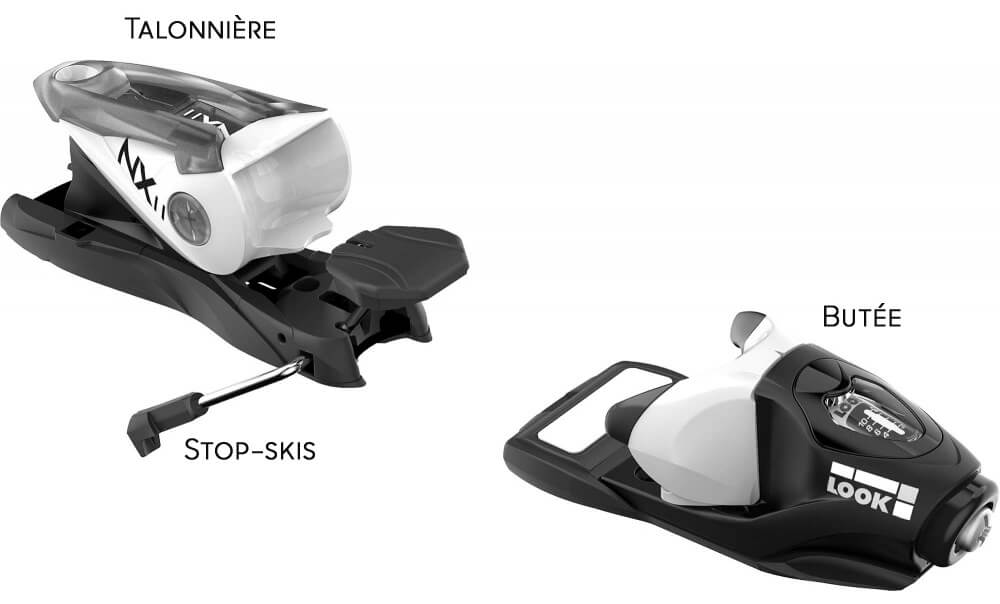
Afin d’ajuster votre fixation, repérez les graduations sur la butée de votre fixation. Les valeurs correspondent à la valeur de déclenchement (plus le chiffre est haut, moins le déchaussement sera facile). Retrouvez ci-dessous un tableau récapitulatif des réglages en fonction du poids, de la tailles et du niveau de ski !
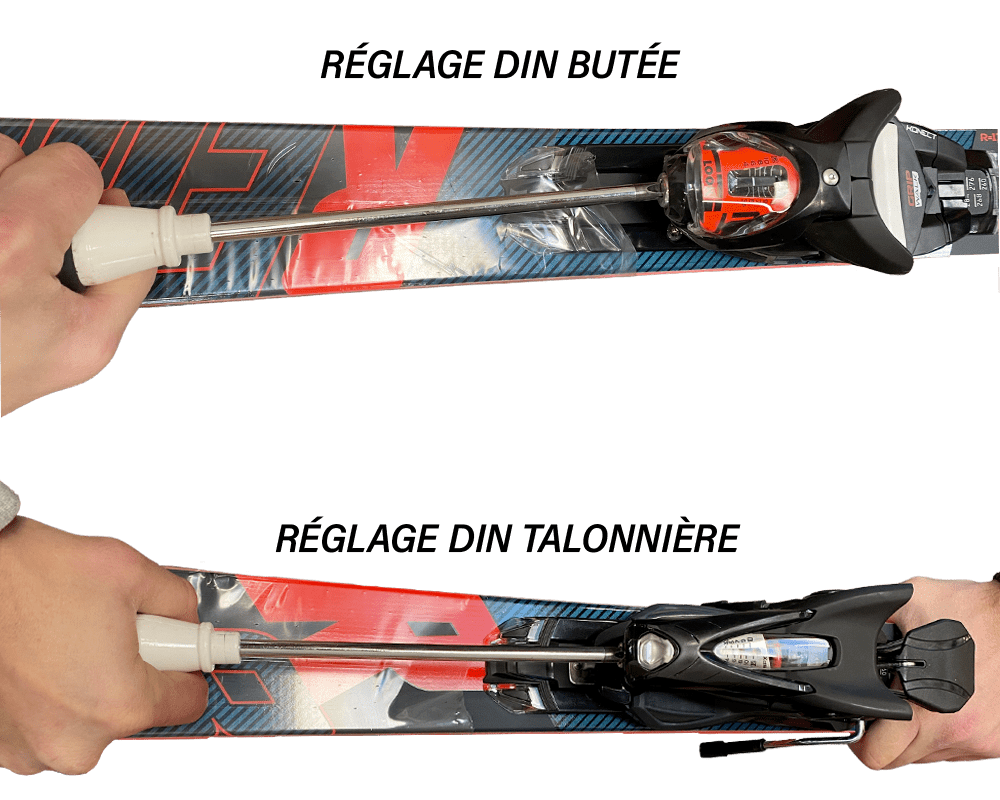
Munissez-vous d’un tournevis pour baisser ou augmenter la graduation selon les valeurs inscrites sur le tableau ci-dessus. Effectuez cette opération sur la butée mais aussi sur la talonnière de votre fixation !